每天推薦一個 GitHub 優質開源項目和一篇精選英文科技或編程文章原文,歡迎關注開源日報。交流QQ群:202790710;微博:https://weibo.com/openingsource;電報群 https://t.me/OpeningSourceOrg

今日推薦開源項目:《TOAST 圖片編輯器 TOAST UI Image Editor》傳送門:GitHub鏈接
推薦理由:TOAST 系列的新作出場了,這次是一個圖片編輯器,可以讓你直接調節不同的選項來更改圖片,有的網站上會需要這樣一個編輯器的,但是記住太過於細緻的東西這個編輯器可做不來,還是交給 PhotoShop 這種專門處理圖片的好。

今日推薦英文原文:《Advanced ReactJS Tutorial: Best Practices for (React + Redux + Sagas) Used In A Simple App》作者:jelo rivera
推薦理由:作者通過一個小程序作為例子來指導讀者更好的理解 React
Advanced ReactJS Tutorial: Best Practices for (React + Redux + Sagas) Used In A Simple App
I remember when I started learning React. I always had the anxious feeling that I could never learn everything I needed to, the ever-changing JavaScript language looming over my head, and if I ever did get something right, I would always end up asking myself, was it really the best way to do it? Btw, this tutorial requires a basic understanding of reactJS and everything in between
After literally hundreds of online tutorials, Youtube searches, and unfinished (and most likely unwashed) cups of coffee, I finally had a firm grasp of what React tries to bring into the JavaScript table. However, I have always struggled to find a tutorial that bundles all the advanced concepts of React into one compact tutorial. That is the gap that this article is trying to fill. This is my first time writing about what I learned so bear with me.
Enough with the chit-chat. Let』s talk code. Download the finished code from this repo and follow the README so you can see and feel what we are going to build here. https://github.com/jelorivera08/react-starter-pack.
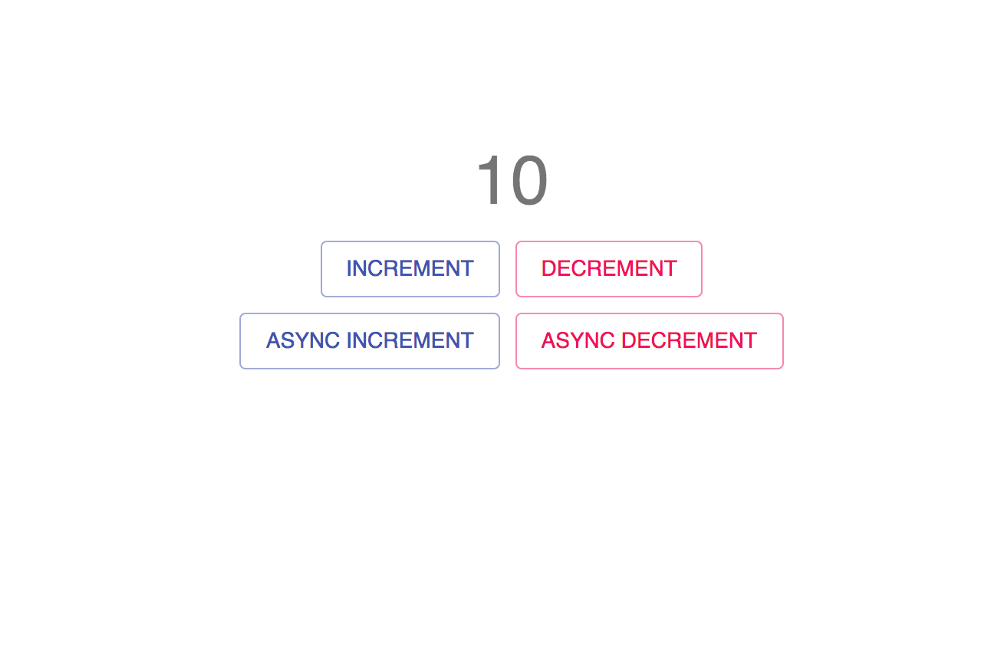
Here, you can see the count state displayed and four buttons that trigger their respective actions. Their actions are self-explanatory.
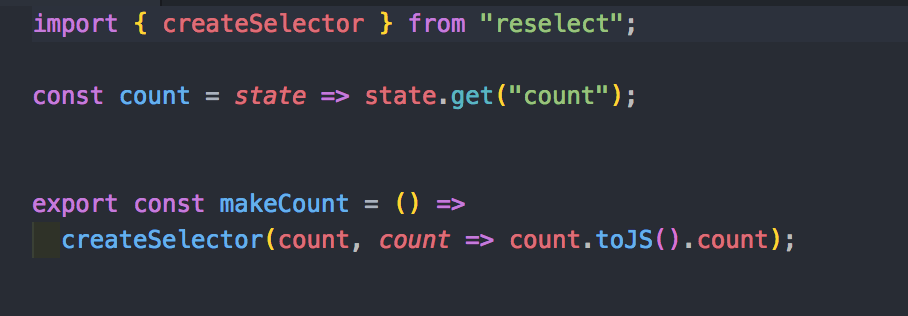
Head on to the selectors.js file inside the Counter container, the first advanced concept we are tackling here is the createSelector. By looking at the code, first, we fetch the count state inside the redux state tree using state.get(『count』). Then, we create a selector using the said method. This helps us format the state/data that we receive from the redux state tree and by doing this, we save a lot of time coding new functions that handle state restructuring or formatting the target state every time we need it to render something in the front-end. In this example, I didn』t alter the state that I received. I just returned the plain state for demo purposes. Then, the resulting function will be used inside the mapStateToProps, and with mapStateToProps, naturally, the next thing to configure is mapDispatchToProps.
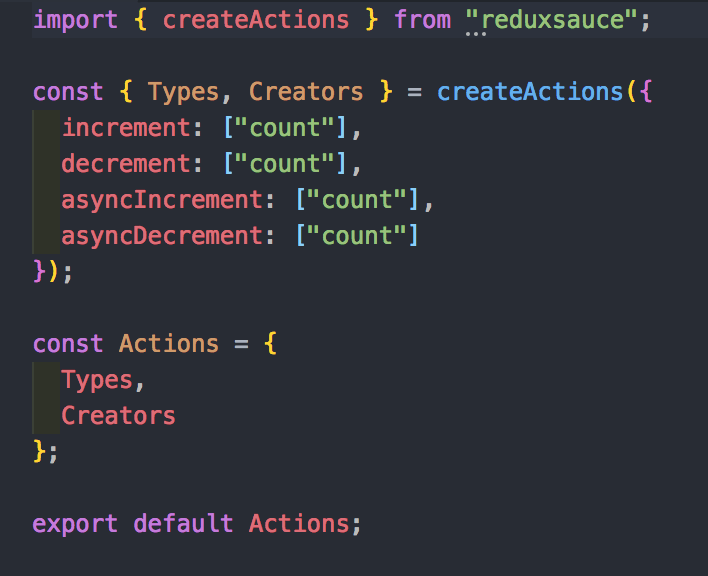
Whenever dispatching reducer actions, we always have to declare its type and the corresponding switch case to a reducer that it will enter later in order to change the application state. With the createActions package from reduxsauce, we can hit two birds with one stone. We should also format the reducer with reduxsauce in order to fully benefit from this package.
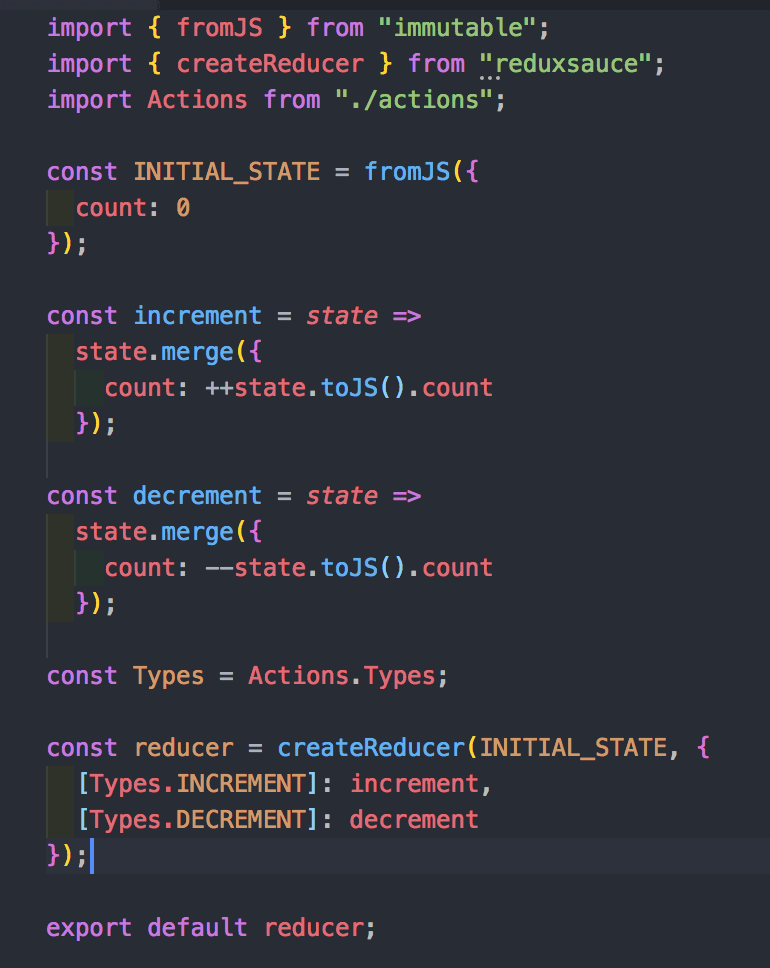
Above is our app』s reducer. The initial state is enclosed by the fromJS API from immutable and as the package name applies, it protects the initial state from being mutated. React is very strict with this concept so always keep this in mind. the createReducer API from reduxsauce has two arguments. First, the initial state. Second, the object that has keys for action types and values as a function that the reducer will fire once a type matches a dispatch call. Merge, then, changes the redux state tree accordingly. There』s no real life app that doesn』t know how to handle asynchronous API calls right? Right.
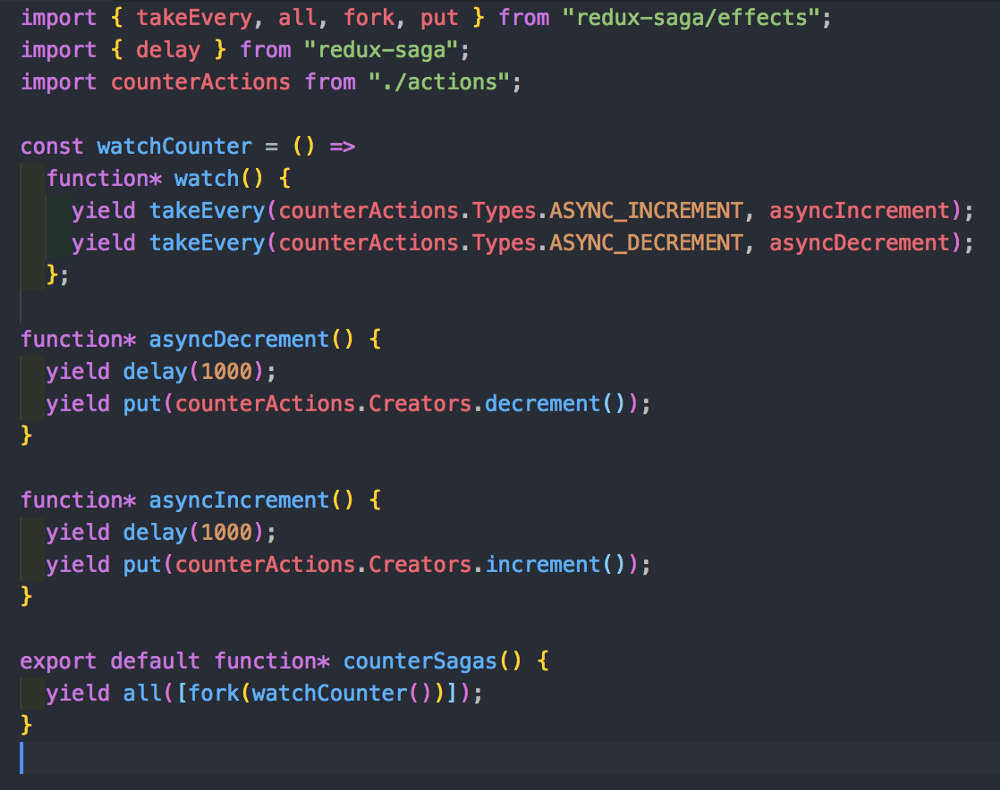
Here is the saga part of our program. Everything is the same except for the way we call our actions. We make use of the type action that we created earlier and utilise them inside our watcher saga in order to dispatch asynchronous calls that which will later affect our redux state tree. The delay is there to mock network latency for a much better async feel of the app. Oh, and lastly, let』s make sure we don』t forget about performance.
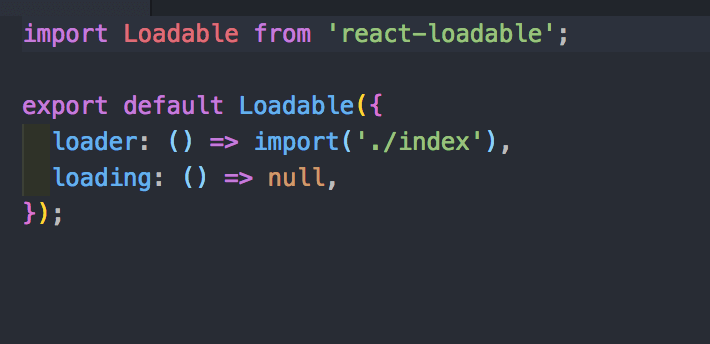
Code splitting is a great way of improving web application performance. JavaScript code takes the most toll on a user』s data. Remember that, so with code splitting, it lets the end-user download only the part of the code it needs for data consumption efficiency.
In conclusion,
There are a lot of packages and tools out there that helps us, software engineers create a cleaner and a much more efficient code. However, it comes with a cost, the cost of understanding the underlying system and that is thinking in React. Learning React requires you to shift your coding paradigm into a much more different one compared to the previous mind-set of coding in front-end. The tools & packages I』ve discussed in this article encapsulates those principals needed in order to code beautifully and efficiently in React and that』s what makes an exceptional developer. It』s always the little things. With that, I hope I』ve helped you further your understanding of React with this small article. Cheers!
每天推薦一個 GitHub 優質開源項目和一篇精選英文科技或編程文章原文,歡迎關注開源日報。交流QQ群:202790710;微博:https://weibo.com/openingsource;電報群 https://t.me/OpeningSourceOrg
