每天推薦一個 GitHub 優質開源項目和一篇精選英文科技或編程文章原文,歡迎關注開源日報。交流QQ群:202790710;微博:https://weibo.com/openingsource;電報群 https://t.me/OpeningSourceOrg

今日推薦開源項目:《萬物皆可 RSS RSSHub》傳送門:GitHub鏈接
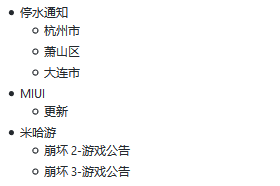
推薦理由:正如標題所說,這玩意真的是給各種你想不到的東西生成 RSS 訂閱源的,比如某個 B 站 UP 的動態,筆趣閣的小說章節,乃至崩崩和崩崩崩的遊戲公告甚至還有停水通知……雖然最後一個對於常年不出門的人來說的確很管用就是了。如果這些奇奇怪怪的東西里剛好有你所需要的東西的話,不妨來試一下自己弄一個訂閱源。
今日推薦英文原文:《Intro to Gestures in React Native》作者:Spencer Carli
原文鏈接:https://medium.com/handlebar-labs/intro-to-gestures-in-react-native-e9b63dd3305
推薦理由:介紹了在 React Native 中如何添加手勢操作,手勢可是個好東西,電腦上還是手機上都很管用
Intro to Gestures in React Native
In this tutorial we』ll be learning to add gesture handling to a React Native app via PanResponder. In a previous tutorial I walked through building a basic JavaScript based navigator for React Native which will serve as the basis of this tutorial.
Getting Started
We』ll be using create-react-native-app to build our app. To get started run the following from your terminal:
create-react-native-app rn-js-navigator
cd rn-js-navigator
Replace App.js with
import React from 'react';
import { StyleSheet, View, Button } from 'react-native';
import { Navigator, Route } from './Navigator';

const Screen1 = ({ navigator }) => (
  <View style={[styles.screen, { backgroundColor: '#59C9A5' }]}>
    <Button
      title="Screen 2"
      onPress={() => navigator.push('Screen2')}
    />
    <Button
      title="Pop"
      onPress={() => navigator.pop()}
    />
  </View>
);

const Screen2 = ({ navigator }) => (
  <View style={[styles.screen, { backgroundColor: '#23395B' }]}>
    <Button
      title="Screen 3"
      onPress={() => navigator.push('Screen3')}
    />
    <Button
      title="Pop"
      onPress={() => navigator.pop()}
    />
  </View>
);

const Screen3 = ({ navigator }) => (
  <View style={[styles.screen, { backgroundColor: '#B9E3C6' }]}>
    <Button
      title="Pop"
      onPress={() => navigator.pop()}
    />
  </View>
);

export default class App extends React.Component {
  render() {
    return (
      <Navigator>
        <Route name="Screen1" component={Screen1} />
        <Route name="Screen2" component={Screen2} />
        <Route name="Screen3" component={Screen3} />
      </Navigator>
    );
  }
}

const styles = StyleSheet.create({
  screen: {
    flex: 1,
    alignItems: 'center',
    justifyContent: 'center',
  },
});
and then create a new file, Navigator.js, with the following contents
import React from 'react';
import { View, StyleSheet, Animated, Dimensions } from 'react-native';

const { width } = Dimensions.get('window');

export const Route = () => null;

const buildSceneConfig = (children = []) => {
  const config = {};

  children.forEach(child => {
    config[child.props.name] = { key: child.props.name, component: child.props.component };
  });

  return config;
};

export class Navigator extends React.Component {
  constructor(props) {
    super(props);

    const sceneConfig = buildSceneConfig(props.children);
    const initialSceneName = props.children[0].props.name;

    this.state = {
      sceneConfig,
      stack: [sceneConfig[initialSceneName]],
    };
  }

  _animatedValue = new Animated.Value(0);

  handlePush = (sceneName) => {
    this.setState(state => ({
      ...state,
      stack: [...state.stack, state.sceneConfig[sceneName]],
    }), () => {
      this._animatedValue.setValue(width);
      Animated.timing(this._animatedValue, {
        toValue: 0,
        duration: 250,
        useNativeDriver: true,
      }).start();
    });
  }

  handlePop = () => {
    Animated.timing(this._animatedValue, {
      toValue: width,
      duration: 250,
      useNativeDriver: true,
    }).start(() => {
      this._animatedValue.setValue(0);
      this.setState(state => {
        const { stack } = state;
        if (stack.length > 1) {
          return {
            stack: stack.slice(0, stack.length - 1),
          };
        }

        return state;
      });
    });
  }

  render() {
    return (
      <View style={styles.container}>
        {this.state.stack.map((scene, index) => {
          const CurrentScene = scene.component;
          const sceneStyles = [styles.scene];

          if (index === this.state.stack.length - 1 && index > 0) {
            sceneStyles.push({
              transform: [
                {
                  translateX: this._animatedValue,
                }
              ]
            });
          }

          return (
            <Animated.View key={scene.key} style={sceneStyles}>
              <CurrentScene
                navigator={{ push: this.handlePush, pop: this.handlePop }}
              />
            </Animated.View>
          );
        })}
      </View>
    )
  }
}

const styles = StyleSheet.create({
  container: {
    flex: 1,
    flexDirection: 'row',
  },
  scene: {
    ...StyleSheet.absoluteFillObject,
    flex: 1,
  },
});
We can now setup the gestures. The only gesture we』re going to have is, when you』ve got multiple screens in the stack, you can swipe back to the previous one.
PanResponder Setup
First we need to import PanResponder from React Native.
We』ll then go ahead and initialize a new pan responder on our component.
Navigator.js
export class Navigator extends React.Component {
  // ...

  _panResponder = PanResponder.create({
    onMoveShouldSetPanResponder: (evt, gestureState) => {

    },
    onPanResponderMove: (evt, gestureState) => {

    },
    onPanResponderTerminationRequest: (evt, gestureState) => true,
    onPanResponderRelease: (evt, gestureState) => {

    },
    onPanResponderTerminate: (evt, gestureState) => {

    },
  });

  // ...
}
Let』s walk through what each of these functions does before we start defining them.
onMoveShouldSetPanResponder: This determines whether our pan responder should actuallly do anything. For this example we want the pan responder to be enabled on all but the first screen and only when the gesture started in the left most 25% of the screen.onPanResponderMove: When the pan responder is enabled and the move is detected, what should happen? This one gets called a lot.onPanResponderTerminationRequest: If something else wants to take over gestures, should it be allowed to?onPanResponderRelease: When the gesture is released/completed, what should happen? For us, if the gesture took up more than 50% of the screen we'll complete it, otherwise we'll keep the user on the current screen.onPanResponderTerminate: When the gesture is terminated (meaning another component became the responder) what should we do? We'll reset to the current screen.
Finally, we need to actually apply the pan handlers to our container component.
Navigator.js
Now to start the implementation.
onMoveShouldSetPanResponder: (evt, gestureState) => {
  const isFirstScreen = this.state.stack.length === 1
  const isFarLeft = evt.nativeEvent.pageX < Math.floor(width * 0.25);

  if (!isFirstScreen && isFarLeft) {
    return true;
  }
  return false;
},
First we check if we』re on the first screen by analyzing this.state.stack, which represents the currently active screens. We then check where the gesture first started by looking at evt.nativeEvent.pageX and see if it's within the left most 25% of the screen.
We then check whether or not we should actually start responding to the gesture! We should only respond if we』re on screen 2+ and if the gesture started in the left quarter of the screen.
onPanResponderMove: (evt, gestureState) => {
  this._animatedValue.setValue(gestureState.moveX);
},
Now, once the pan responder has been enabled we』ll update this._animatedValue, which drives our offset, to be whatever the value that is provided. gestureState.moveX is going to be wherever the user's finger is on the x axis.
You can actually go ahead and test it now. It』s working but when you let go/stop the gesture the screen just sticks there.
onPanResponderRelease: (evt, gestureState) => {
  if (Math.floor(gestureState.moveX) >= width / 2) {
    this.handlePop();
  } else {
    Animated.timing(this._animatedValue, {
      toValue: 0,
      duration: 250,
      useNativeDriver: true,
    }).start();
  }
},
To fix that we need to implement onPanResponderRelease. In this function we're going to check if wherever the user released the screen was in the right 50% of the screen. If it was then we'll call the this.handlePop function to finish the animation and pop the screen off the stack.
If the screen wasn』t in the right most 50% then we』ll reset the screen offset to 0.
onPanResponderTerminate: (evt, gestureState) => {
  Animated.timing(this._animatedValue, {
    toValue: 0,
    duration: 250,
    useNativeDriver: true,
  }).start();
},
And when the pan responder is taken over we』ll reset the screen to a 0 offset.
All of this leaves us with the following
The final Navigator.js is
import React from 'react';
import { View, StyleSheet, Animated, Dimensions, PanResponder } from 'react-native';

const { width } = Dimensions.get('window');

export const Route = () => null;

const buildSceneConfig = (children = []) => {
  const config = {};

  children.forEach(child => {
    config[child.props.name] = { key: child.props.name, component: child.props.component };
  });

  return config;
};

export class Navigator extends React.Component {
  constructor(props) {
    super(props);

    const sceneConfig = buildSceneConfig(props.children);
    const initialSceneName = props.children[0].props.name;

    this.state = {
      sceneConfig,
      stack: [sceneConfig[initialSceneName]],
    };
  }

  _animatedValue = new Animated.Value(0);

  _panResponder = PanResponder.create({
    onMoveShouldSetPanResponder: (evt, gestureState) => {
      const isFirstScreen = this.state.stack.length === 1
      const isFarLeft = evt.nativeEvent.pageX < Math.floor(width * 0.25);

      if (!isFirstScreen && isFarLeft) {
        return true;
      }
      return false;
    },
    onPanResponderMove: (evt, gestureState) => {
      this._animatedValue.setValue(gestureState.moveX);
    },
    onPanResponderTerminationRequest: (evt, gestureState) => true,
    onPanResponderRelease: (evt, gestureState) => {
      if (Math.floor(gestureState.moveX) >= width / 2) {
        this.handlePop();
      } else {
        Animated.timing(this._animatedValue, {
          toValue: 0,
          duration: 250,
          useNativeDriver: true,
        }).start();
      }
    },
    onPanResponderTerminate: (evt, gestureState) => {
      Animated.timing(this._animatedValue, {
        toValue: 0,
        duration: 250,
        useNativeDriver: true,
      }).start();
    },
  });

  handlePush = (sceneName) => {
    this.setState(state => ({
      ...state,
      stack: [...state.stack, state.sceneConfig[sceneName]],
    }), () => {
      this._animatedValue.setValue(width);
      Animated.timing(this._animatedValue, {
        toValue: 0,
        duration: 250,
        useNativeDriver: true,
      }).start();
    });
  }

  handlePop = () => {
    Animated.timing(this._animatedValue, {
      toValue: width,
      duration: 250,
      useNativeDriver: true,
    }).start(() => {
      this._animatedValue.setValue(0);
      this.setState(state => {
        const { stack } = state;
        if (stack.length > 1) {
          return {
            stack: stack.slice(0, stack.length - 1),
          };
        }

        return state;
      });
    });
  }

  render() {
    return (
      <View style={styles.container} {...this._panResponder.panHandlers}>
        {this.state.stack.map((scene, index) => {
          const CurrentScene = scene.component;
          const sceneStyles = [styles.scene];

          if (index === this.state.stack.length - 1 && index > 0) {
            sceneStyles.push({
              transform: [
                {
                  translateX: this._animatedValue,
                }
              ]
            });
          }

          return (
            <Animated.View key={scene.key} style={sceneStyles}>
              <CurrentScene
                navigator={{ push: this.handlePush, pop: this.handlePop }}
              />
            </Animated.View>
          );
        })}
      </View>
    )
  }
}

const styles = StyleSheet.create({
  container: {
    flex: 1,
    flexDirection: 'row',
  },
  scene: {
    ...StyleSheet.absoluteFillObject,
    flex: 1,
  },
});
You can find a running example on Snack.
I hope you found this example fun and valuable! If you』re interested in learning more about React Native checkout my free basics of React Native course! Or, if you』re further along, checkout my Production Ready React Native course!
每天推薦一個 GitHub 優質開源項目和一篇精選英文科技或編程文章原文,歡迎關注開源日報。交流QQ群:202790710;微博:https://weibo.com/openingsource;電報群 https://t.me/OpeningSourceOrg
