每天推薦一個 GitHub 優質開源項目和一篇精選英文科技或編程文章原文,歡迎關注開源日報。交流QQ群:202790710;微博:https://weibo.com/openingsource;電報群 https://t.me/OpeningSourceOrg
今日推薦開源項目:《一次收工一本萬利 Taro》傳送門:GitHub鏈接
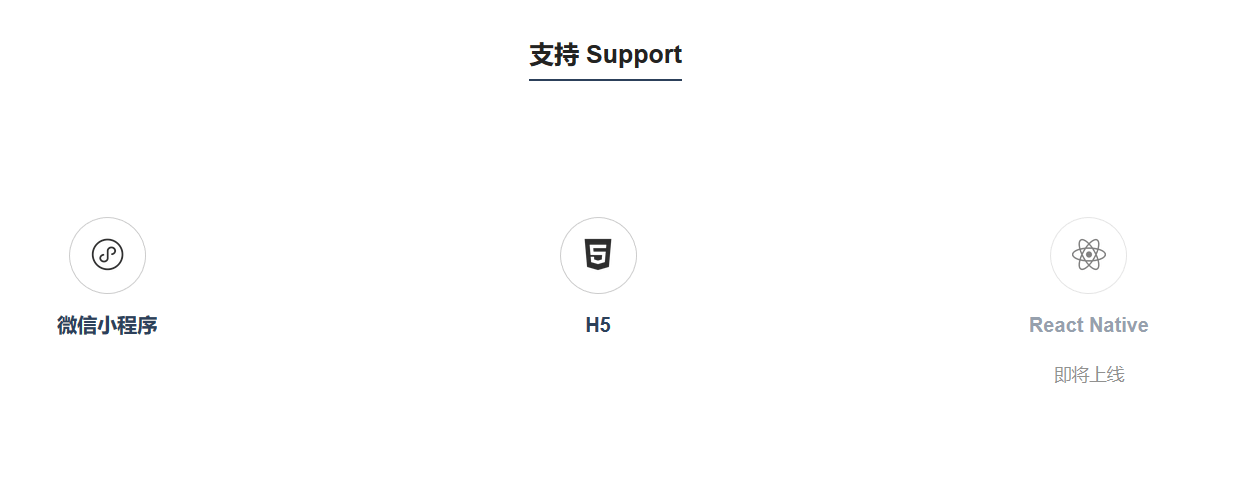
推薦理由:這個項目當然不是泰羅奧特曼,而是一個使用 React 開發方式的多端統一的開發框架。簡而言之,就是你可以只編寫一份代碼,比如說寫一份 HTML5 的代碼,然後它能幫你轉換成微信小程序的代碼丟過去接著用,之後還會支持更多平台,可以期待今後使用它的便利性。
今日推薦英文原文:《Pug.js to make your life easier with HTML templates》作者:Uday Hiwarale
原文鏈接:https://itnext.io/pug-js-to-make-your-life-easier-with-html-templates-9c62273626e0
推薦理由:介紹了一個 HTML 模版引擎 Pug.js ,有很多應用程序需要在伺服器或瀏覽器上生成 HTML 代碼,而它很適合做這樣的工作。
Pug.js to make your life easier with HTML templates
Pug.js is a HTML templating engine, which means you can write much simpler Pug code, which Pug compiler will compile into HTML code, that browser can understand. But why not write HTML code in the first place?
Pug has powerful features like conditions, loops, includes, mixins using which we can render HTML code based on user input or reference data. Pug also support JavaScript natively, hence using JavaScript expressions, we can format HTML code.
An application of that would be Email Templates to send email customized to particular user. We can make an email template using Pug with variables that can be changed based on user to whom we are sending that email. Before sending email,we can compile Pug to HTML code with user data to fill the gaps where that dynamic information should go. Trust me, this will save you lot of time.
There are lot of applications where HTML code needs to be generated on server or browser and Pug fits perfectly for those kind of environments. So let』s get started.
Pug.js, as from its name is a JavaScript library. Hence, we can run it inside browser or on node.js. Here, I am using node.js to demonstrate few examples.
Pug provides two npm packages viz.pug and pug-cli. pug is a general purpose package and pug-cli are command line interface to compile pug code into HTML code from command line without writing any JavaScript code. I am going to start with pug-cli because this is very easy to do.
Hence, let』s install pug-cli package with command npm install -g pug-cli, -g because we need to install it globally as to access Pug commands from command prompt or terminal. Pug files ends with extension .pug and compiles to files with extension .html
If you have index.pug file in a folder, you can open terminal there and execute command pug index.pug which should compile index.pug into index.html file. If you have a separate folder for all .pug files, let』s say src then you should use pug src command which should place all compiled .html files in the same folder. I like all compiled files to be located in separate folder, like dist. Hence I used pug src --pretty --out dist command. You can visit repo page on GitHub at https://github.com/pugjs/pug-cli to know more about pug CLI command flags.
Let』s see how pug code looks like.
doctype html
html
    head
        //- Invisible comment in head section which will not appear in rendered html
        // Visible comment in head block which will appear in rendered html

        <!-- html comment will work fine too, but I don't get the idea! -->
    body
        //-
            Block invisible comment in body section
            which will not appear in rendered html

        //  "Comment can start from this line as well."
            Visible comment in head block
            which will appear in rendered html.
As you can see from above, for the beginner it doesn』t make any sense. But give me a chance to walk you through it. doctype html is a syntax which Pug compiles to <!DOCTYPE html> and html, head and body are regular tags which compiled to <html></html>, <head></head> and <body></body>. Like python, Pug uses tabs to make code blocks. Hence as head and body tags are inside html tabbed block, they will be included in html tag, while head and body will be siblings. Please read the code and comments carefully from here on, because most of the stuff is explained inside the code itself in form of comments.
When you will compile above code, it will look like
<!DOCTYPE html>
<html>
  <head>
    <!-- Visible comment in head block which will appear in rendered html--><!-- html comment will work fine too, but I don't get the idea! -->
  </head>
  <body>
    <!--  "Comment can start from this line as well."
    Visible comment in head block
    which will appear in rendered html.
    -->
  </body>
</html>
Take few moments to understand how it happened, because after this, everything is pretty simple.
HTML code is mostly about tags, attributes and text. Hence Pug mostly focuses on that, making is injectable with dynamic data. Let』s see how tags and text works. Pug uses same HTML tags so no worry there.
//- Simple inline paragraph text
p I am inline text

//- These two pipes will create 2 new lines
|
|
//- This will add empty line between above code and below code
//-
    Literal html will also work.
    Pug will simply ignore any text starting with `<` left angle bracket.
    Hence you need to manually close tag.
<p>I am literal html code </p>

//-
    Unlike block comments, we can not add more text in new lines.
    Because any text inside a tag is valid pug code and pug will try to compile it.
    Hence, we need to use `.` dot or `|` pipe character.
//- Using pipe character in every line, we can span text over multiple lines.
//- Pipe character will treat text as normal text and add new line.
//- But we can mix any valid pug code in new line using this style.
p
    | Hello World!
    | I am Pug, your buddy to write simple HTML templates.
    em Let's explore the world, shall we?
    | Very nice to meet you :)

//- To create block of text with auto line break, we can use `.` character.
//- There should not be any space between tag name and `.` dot character.
//- Any text in this block is not processed by Pug, hence you need to use HTML literal unline previous example.
//- Dot character must start right after the tag name,
    or after the closing parenthesis `)` if the tag has attributes.
p.
    Hello World!
    I am Pug, your buddy to write simple HTML templates.
    <em>Let's explore the world, shall we?</em>
    Very nice to meet you :)
//- Using `.` dot character, we can make use of block of text to write style or script code,
//- since, all text in this block will not be processed by pug.
script.
    if(window.navigator.geolocation){
        console.log("Geolocation available!")
    }
    else{
        console.warn("Geolocation not available!")
    }
style(type="text/css").
    html, body{
        padding: 0;
        margin: 0;
    }

//- We can also create a dot block of plain text after other tags within the parent tag.
div
    p Hello World! I am in a paragraph. I am optional here :(
    .
        Hey there!
        I am in a block but in `div` tag.
        Because, dot without a tag will put me in parent tag.

//- Pug provided tag interpolation.
//- syntax for tag interploation is like `#[tagName content]`
p
    b Hi there! I am #[strong John Doe].

//- Pug provided `:` operator to make block expression into inline.
p: b Hi there! I am inline #[strong John Doe].

//- Pug automatically closes self closing tags like `img`, `br`, `link` etc.
//- But to force pug to self close a custom tag is to put `/` forward slash at the end of the tag
double-break/
<p>I am inline text</p>
<p>I am literal html code </p>
<p>
  Hello World!
  I am Pug, your buddy to write simple HTML templates.<em>Let's explore the world, shall we?</em>Very nice to meet you :)
</p>
<p>
  Hello World!
  I am Pug, your buddy to write simple HTML templates.
  <em>Let's explore the world, shall we?</em>
  Very nice to meet you :)
</p>
<script>
  if(window.navigator.geolocation){
      console.log("Geolocation available!")
  }
  else{
      console.warn("Geolocation not available!")
  }
</script>
<style type="text/css">
  html, body{
      padding: 0;
      margin: 0;
  }

</style>
<div>
  <p>Hello World! I am in a paragraph. I am optional here :(</p>Hey there!
  I am in a block but in `div` tag.
  Because, dot without a tag will put me in parent tag.

</div>
<p><b>Hi there! I am <strong>John Doe</strong>.</b></p>
<p><b>Hi there! I am inline <strong>John Doe</strong>.</b></p>
<double-break/>
Writing attributes in Pug can be little bit tricky. But I am sure, it won』t be too hard to understand after reading comments.
//- An attribute but be added inside parentheses.
//- They might look similar to plain HTML attributes but value of an attribute is actually a JavaScript exprssion.
//- Below is string used as JavaScript expression.
a(href="https://google.com") google.com

//- An example of actual JavaScript expression.
//- You can separate multiple attributes using `,` or ` ` space character.
a(href="https://" + "google" +  ".com", target="_blank") google.com

//- Using inline JavaScript variable
//- Read more about inline JavaScript code in `inline JavaScript` topic below.
//- Below, we used ` ` space character to separate multiple attributes
- var srcLink = "https://design.google.com/logo.png"
img(src=srcLink alt="google logo")

//- using ES6 string interpolcation.
- var size = "medium"
img(src=`https://design.google.com/logo-${size}.png` alt="google logo")

//- Using boolean value.
input(type='checkbox' checked)
input(type='checkbox' checked=true)
input(type='checkbox' checked=false)

//- If you have huge list of attributes, you can span attributes over multiple lines.
//- We can also use single-quotes `''` or double-quotes `""` to wrap attribute name.
input(
    type="text"
    "name"="username"
    'placeholder'="Enter your username"
    readonly=false
    required
)

//- Pug.js escapes all attributes by default
img(src="<code></code>")

//- To prevent attribute value escape, use `!=` syntax instead of `=` for attribute value assignment
img(src!="<code></code>")

//- Adding style attribute is just like any other attribute using string value.
a(href="some-link", style="color:red;font-size:12px;") Click Me!
//- But Pug.js provides `Object` literal syntax as well.
a(href="some-link", style={color: "Red", "font-size": "12px"}) Click Me!

//- Adding class attribute is also just like any other attribute using string value.
a(href="some-link", class="link special") Click Me!
//- But Pug.js provides `Object` and `Array` syntax as well.
a(href="some-link", class=["link", "special"]) Click Me!
a(href="some-link", class=["link", "special"] class="general") Click Me!
a(href="some-link", class={link: true, special: true, hidden: false}) Click Me!
//- Class literal is also valid
button.btn.btn-sm Click Me
p.simple.
    Hello World!
    I am in a block
.general.div I am in default tag is `div`.
//- Like class literal, id literal is also valid.
a#main-link Click Me!
a.link#main-link Click Me!
#main-link I am in default tag is `div`.
From here on, I am formatting the code little bit so that you can compare Pug code with HTML.
<a href="https://google.com">google.com</a>
<a href="https://google.com" target="_blank">google.com</a>
<img src="https://design.google.com/logo.png" alt="google logo" />
<img src="https://design.google.com/logo-medium.png" alt="google logo" />
<input type="checkbox" checked="checked" />
<input type="checkbox" checked="checked" />
<input type="checkbox" />
<input type="text" name="username" placeholder="Enter your username" required="required" />
<img src="<code></code>" />
<img src="<code></code>" />
<a href="some-link" style="color:red;font-size:12px;">Click Me!</a>
<a href="some-link" style="color:Red;font-size:12px;">Click Me!</a>
<a class="link special" href="some-link">Click Me!</a>
<a class="link special" href="some-link">Click Me!</a>
<a class="link special general" href="some-link">Click Me!</a>
<a class="link special" href="some-link">Click Me!</a>
<button class="btn btn-sm">Click Me</button>
<p class="simple">
Hello World! I am in a block
</p>
<div class="general div">I am in default tag is `div`.</div>
<a id="main-link">Click Me!</a>
<a class="link" id="main-link">Click Me!</a>
<div id="main-link">I am in default tag is `div`.</div>
The powerful thing about Pug is inline JavaScript code. This is where dynamic data comes from. Binding this dynamic data to HTML can be tricky using custom approach, but with Pug, it』s kind of no brainier.
//- Pug.js allow writing inline JavaScript code.
//- Unbuffered JavaScript code does not output any results.
//- Unbuffered code must start with `-` hyphen.
- var fieldName = "username"
- var required = false
input(type="text", name=fieldName, required=required)

//- Pug.js also support block Unbuffered code.
-
    // JavaScript comment inside the block
    var classes = [
        "general",
        "link",
        "active"
    ];
a(href="some-link", class=classes)

//- Buffered JavaScript code output results.
//- Buffered code starts with `=`
p= "Hello World! I am <b>Pug.js!</b>"

//- Buffered code is escaped by default.
//- Like attributes, you can use `!=` syntax to prevent that.
p!= "Hello World! I am <b>Pug.js!</b>"

//- Pug.js provided built in conditional `if-else` syntax.
//- Paranthese are optional.
- var gender = "MALE"
if(gender == "MALE")
    p I am male.
else if gender == "FEMALE"
    p I am female.
else
    p I am special.

//- Pug also provides `unless` conditional syntax which works like a negated if.
//- This will work only when condition is true.
- var loggedin = false
unless loggedin
    p
        a.link(href="some-link") Click to log in.

//- For loops, Pug has for, `for in`, `each in` and `while` loop.
//- While, in case of `for` loop, `-` hyphen is necessary.
ul
    - for (var i = 0; i < 3; i++)
        li= `current value is ${i}`


- var i = 0
ul
    while i < 3
        li= `current value using while is ${i++}`

- var list = [0,1,2]
ul
    for i in list
        li= `current value using for-in is ${i}`

ul
    each i in list
        li= `current value using each-in is ${i}`

//- Pug does not a `switch` statement but support similar `case-when` statement.
//- You can also write when expression in single line or block.
- var gender = "MALE"
case gender
    when "MALE"
        p I am male.
    when "FEMALE": p I am female.
    default
        p I am special.


//- Interpolation in Pug is very easy.
//- Like ES6 uses `${variable}` syntax, Pug uses `#{variable}` syntax.
- var name="John Doe"
p Hi, My name is #{name}.

//- Any code inside curly braces of `#{}` is valid javascript expression
- var name="John <b>Doe</b>"
p Hi, My name is #{name.toLowerCase()}.

//- By default, value inside curely brace is escaped.
//- To prevent that, use `!` operator.
- var name="John <b>Doe</b>"
p Hi, My name is !{name.toLowerCase()}.
If you are familiar with Angular or React, then this must not make you crazy.
<input type="text" name="username"/><a class="general link active" href="some-link"></a> <p>Hello World! I am <b>Pug.js!</b></p> <p>Hello World! I am <b>Pug.js!</b></p> <p>I am male.</p> <p><a class="link" href="some-link">Click to log in.</a></p> <ul> <li>current value is 0</li> <li>current value is 1</li> <li>current value is 2</li> </ul> <ul> <li>current value using while is 0</li> <li>current value using while is 1</li> <li>current value using while is 2</li> </ul> <ul> <li>current value using for-in is 0</li> <li>current value using for-in is 1</li> <li>current value using for-in is 2</li> </ul> <ul> <li>current value using each-in is 0</li> <li>current value using each-in is 1</li> <li>current value using each-in is 2</li> </ul> <p>I am male.</p> <p>Hi, My name is John Doe.</p> <p>Hi, My name is john <b>doe</b>.</p> <p>Hi, My name is john <b>doe</b>.</p>
You mostly won』t hardcode data in the Pug code. This data is mostly dynamic and can come from any source, like SQL Database or REST api. We will learn about how to inject data into Pug template in upcoming topic once we are done with all features of Pug.
If you are used to PHP, then you must know that we can include other PHP files into the code. Pug also support including code from other Pug and non Pug files.
//- Like PHP, we can include content of another file in a file.
//- If another file extension is `.pug`, then it's content will be compiled.
//- If another files is non-pug file, then it's content will be included as raw text.
//- If no file extenstion is given, `.pug` is automatically appended to the file name.
doctype html
html
    head
        title Includes Example
        include includes/resources.pug

        style
            include includes/style.css
    body
h1 Hello World
//- located in includes folder
link(rel="stylesheet", href="http://website.com/style.css")
script(src="http://website.com/script.js")
/* located in includes folder */
html,
body {
    padding: 0;
    margin: 0;
    font-size: 14px;
}
<!DOCTYPE html>
<html>

<head>
    <title>Includes Example</title>
    <link rel="stylesheet" href="http://website.com/style.css">
    <script src="http://website.com/script.js"></script>
    <style>
        /* located in includes folder */
        html,
        body {
            padding: 0;
            margin: 0;
            font-size: 14px;
        }
    </style>
</head>

<body>
    <h1>Hello World</h1>
</body>

</html>
If you are wondering what if I need to use same piece of code over and over again, then don』t worry. If you are familiar with SASS, then you must know about mixin. Pug also provide similar kind of feature to add code re-usability in your program. Mixin in Pug is wrapper or functional wrapper around a block of Pug code.
//- Mixin is used to create reusable block of code.
//- Mixin is just a wrapper around proper Pug code.
//- Mixin can also be a function with arguments.
mixin notAllowed
    p: b You are not allowed here

mixin user(data)
    li
        p.name= data.name
        p.city= data.city

//- to use mixin, just use `+` plus operator with mixin name
.critical-section
    +notAllowed

-
    var users = [
        {name: "Ross Geller", city: "New York"},
        {name: "Monica Geller", city: "Little Rock"},
    ]
ul.user-list
    for data in users
        +user(data)

//- Mixin has a internal `block` variable which refers to the content of mixin.
//- If mixin is used like a tag, then `block` variable will have that content, else it will be empty.
mixin user(data)
    li
        p.name= data.name
        p.city= data.city

        .meta
            if block
                block
            else
                p This user has no meta information.

ul.user-list
    +user({name: "Ross Geller", city: "New York"})
        p Ross likes Rachel.

    +user({name: "Monica Geller", city: "Little Rock"})

//- Mixin has a internal `attributes` variable.
mixin user(data)
    li(class!=attributes.class)
        p.name= data.name
        p.city= data.city

        .meta
            if block
                block
            else
                p This user has no meta information.

ul.user-list
    +user({name: "Ross Geller", city: "New York"})(class="active")
        p Ross likes Rachel.

+user({name: "Monica Geller", city: "Little Rock"})
<div class="critical-section">
    <p>
        <b>You are not allowed here</b>
    </p>
</div>
<ul class="user-list">
    <li>
        <p class="name">Ross Geller</p>
        <p class="city">New York</p>
    </li>
    <li>
        <p class="name">Monica Geller</p>
        <p class="city">Little Rock</p>
    </li>
</ul>
<ul class="user-list">
    <li>
        <p class="name">Ross Geller</p>
        <p class="city">New York</p>
        <div class="meta">
            <p>Ross likes Rachel.</p>
        </div>
    </li>
    <li>
        <p class="name">Monica Geller</p>
        <p class="city">Little Rock</p>
        <div class="meta">
            <p>This user has no meta information.</p>
        </div>
    </li>
</ul>
<ul class="user-list">
    <li class="active">
        <p class="name">Ross Geller</p>
        <p class="city">New York</p>
        <div class="meta">
            <p>Ross likes Rachel.</p>
        </div>
    </li>
    <li>
        <p class="name">Monica Geller</p>
        <p class="city">Little Rock</p>
        <div class="meta">
            <p>This user has no meta information.</p>
        </div>
    </li>
</ul>
You probably want to define mixins in separate file and include them in the file when needed to make them truly resuable.
So far we have seen inline JavaScript code, but trust me, you will be hardy using it. Instead, your data can come from any source and can be dynamic in nature. Hence, while running an application, for example, an email server, you want to get compiled email code with user data hard-coded when some event fires so that you could send that email to the user. Here, pug-cli can not help you. You need to use pug package to compile Pug code into HTML on the fly.
But compilation is CPU and Memory intensive. Is it really wise to compile a template 1000 times per minute for 1000 email send requests of 1000 users? Don』t worry, Pug fixes that by caching the template.
This is much well explained at https://pugjs.org/api/getting-started.html
So far, we have explored many things in Pug and hopefully you are now comfortable to work with it. But there are many things to explore in Pug.js, hence you should check out their official documentation on https://pugjs.org
每天推薦一個 GitHub 優質開源項目和一篇精選英文科技或編程文章原文,歡迎關注開源日報。交流QQ群:202790710;微博:https://weibo.com/openingsource;電報群 https://t.me/OpeningSourceOrg
