每天推荐一个 GitHub 优质开源项目和一篇精选英文科技或编程文章原文,欢迎关注开源日报。交流QQ群:202790710;微博:https://weibo.com/openingsource;电报群 https://t.me/OpeningSourceOrg

今日推荐开源项目:《数学符号 math-as-code》传送门:GitHub链接
推荐理由:当你在研究某本数学书然后发现一个惊人的事实:看不懂符号啊怎么办——的时候,这个项目兴许可以帮上你的忙。这个项目将数学符号和 JS 代码进行对比,从而帮助程序员理解数学符号,从简单的等于不等于和绝对值这样的到点乘和叉乘以及向上/下取整这些平时不太常见的,单单看书不太能理解的话配合 JS 代码兴许能让你更好的理解——毕竟对于经常看代码的人来说,它们可能比文字更亲切些。

今日推荐英文原文:《What is Git?》作者:Devon Campbell
原文链接:https://medium.com/@devon_56979/what-is-git-5ff706ad59bc
推荐理由:Git 是一个版本控制系统,当你用习惯之后,你会发现它会对不管是单人还是团队的工作提供不小的便利,而且能够帮你在需要版本回退的时候救你一命
What is Git?
And why should web developers care?
Git is a version control system. Let’s break down the jargon and figure out what that means to us web developers.
What is “version control?”
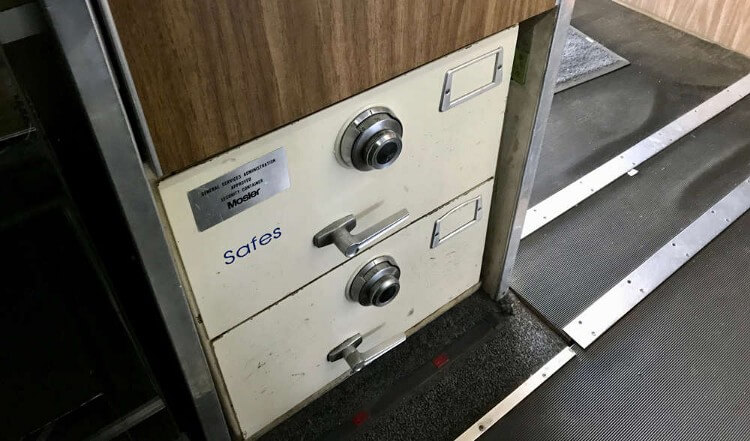
For anyone curious, pictured above are the built-in safes on-board the Nixon-era Air Force One.
A version control system allows you to keep track of more than just what’s currently in a file. You also track what changed at various points in time. If you just have an HTML file on your hard drive, the contents of that file are whatever they were the last time you clicked “Save” in your editor. Make some more changes and click “Save” again: the file will now reflect your latest changes. The previous changes are lost forever.
What is a “commit?”
Git gives you an additional “class” of saving. Normal saving works just like before, overwriting whatever was previously saved with the new version. You can also commit your changes to version control. A commit sets up a point in time you can roll back to with Git. If you realize you made a mistake at some point in the past, Git allows you to roll back to any of your previous commits.
Committing in Practice
I’m working on a social networking app. I just added a tab that will allow people to see their connections in the app. This required changes in several files in my project. I’ve made those changes and saved all of the files. Now, I can commit these new changes to Git. I’ll run git commit -am "Adds connections tab" to stage (more on that later) and commit all changes. The -am options are for adding all unstaged changes to the stage and providing a message for the commit respectively.
I’ve added a handful of additional features since the connections tab, but my users are up in arms about the connections tab. I’m losing users at an alarming rate, and I need to pull back on that feature.
This would be a real pain without source control since some of the subsequent features built on top of the connections tab. I would have to hunt down everything I’d done since that change. Instead, I can revert back to the prior commit to be right back where I was before connections.
That’s how committing works, but let’s look at an entire Git workflow. First, though, let’s take a step back and learn how to set up Git on your system.
Getting Started with Git
The best way to install Git on the Mac is using the Homebrew package manager. If you have Homebrew installed, you can run brew install git in your terminal. Once that’s done, you can run git from the terminal to confirm the installation worked.
? Homebrew
Homebrew is a package manager for the Mac. It makes installing and updating command-line apps easier. Install it by pasting the installation command shown on their web page into your Mac’s terminal.
On Windows, you can download the Git installer from the Git downloads page. The Windows installer should install Git-Bash which gives you a shell command line in Windows. (You’ll use this the same way you would use the terminal of a Mac or on Linux.d
Most Linux distributions will have Git available in their default package repositories.
Git GUI vs. Command Line
The temptation to go straight to a GUI is strong, especially with an application with as many different features as Git. You have quite a few options if you decide to go down that road.
I’d recommend you learn the command-line interface instead. Here’s why:
- No Git GUI will ever expose all the functionality of Git. Take a look at the reference for just the
git commitcommand. I’d be shocked if a single GUI can even expose the options for just this single command, let alone all the other Git commands. - The commands you need to use on a daily basis are pretty easy to learn. Even though git has dozens of commands, you’ll probably learn 3–4 of them and search for the correct command when you need to do something offered by one of the others.
The command line lacks the discoverability of a good GUI, but that’s not a huge deal since you need only a few commands on a regular basis. That coupled with the fact that, via the command line, you’ll have access to all of Git’s functionality leads me to recommend the command line.
You want to leave your ? job to become a web developer. I want to help. Head over to Rad Devon to sign up for a free mentoring session!
Git Basic Workflow
We’ve looked at a quick example of how you might commit, but we missed a lot of the context around that. Let’s look at a simple workflow for how you might use git.
git init
The first step is to initialize a git repository. The repository is just the container that stores all the version history for a project. You do that by navigating to the project directory on your computer in the terminal and running git init from there.
You can do this just after you’ve created a new directory for a brand new project, or you can do it in an existing project directory if you want to start using Git version control with that project. This is an important command, but you’ll only use it once per project.
git add
Now you have a repository initialized in your project directory, but it doesn’t know which files it needs to care about. By default, it won’t care about any of them. You tell it which files to track using git add.
You could just start adding files one by one until you have added everything you care about, but that sounds like a lot of work. You probably want most of the files under version control. Wouldn’t it be easier to tell Git which files you don’t want it to care about and then add everything else? Fortunately, Git has a way to do that too.
Create a text file in the root directory of your project named .gitignore. (Take the note of the leading dot. This makes the file invisible so that it doesn’t clutter up your directory listings. If you leave it out, Git won’t know what to ignore.) This is just a standard text file. Each line is a file pattern. Git will ignore any files matching any of these patterns.
These patterns are the same kinds of patterns you use in other terminal commands. Maybe you’ve deleted all the text files in a directory by using rm *.txt. *.txt is a file pattern. They can have wildcards (like *) that match anything, or they can simply be the name of a file or directory (like node-modules). If you want to know more about the .gitignore file, check out the Git documentation.
? Which Files to Ignore
You know how to ignore files now, but it may not be obvious which files you’d want to ignore. In general, you only want files that you have written yourself in source control. In a simple project like just some HTML and CSS, that might be everything. If your project has dependencies or gets built inside the project directory, you would want to ignore those. You’d also want to ignore any editor configuration files or any files that are specific to you or your computer.
Here’s an example .gitignore file from a GatsbyJS project:
node_modules/
public
.gatsby-context.js
.DS_Store
.intermediate-representation/
.cache/
yarn.lock
node_modules is ignored because it’s where dependencies are installed. public gets ignored because that’s where the project gets built. .DS_Store is a file macOS creates in every directory. .gatsby-context.js is generated automatically by Gatsby. yarn.lock should be in version control according to Yarn, but Gatsby’s project scaffolding adds it to the ignore file.
If you have all the files you don’t want in version control ignored using a .gitignore file, you can now add everything else with git add ..
git status
git status shows you which files are staged, which have changes that aren’tstaged, and which files are not yet watched (but also not ignored). I run it pretty often between other commands just to see exactly what state everything is in and make sure I haven’t accidentally staged something I thought was ignored.
git commit
Once you have some changes (or newly added files) staged with git add, you’ll create a commit with git commit. Again, this creates a snapshot you’ll be able to revert back to if something goes wrong. A commit can capture a single save to a single file. It can capture multiple saves to a single file. A single commit can represent one save each to many files or many saves to many files.
When you’re thinking about how often to commit, keep in mind that you won’t be able to get back to any state between commits. If you do a week’s worth of work but forget to commit, committing once at the end, the only history you have is a single commit for all that work. That means, if you need to revert, you can either revert the entire week’s work or none of it.
The Git Loop
Now that you have your project in place, you’ll start going through the Git loop. Here’s what it looks like:
- Make your changes
- Save them
- Stage your changes with
git add - Commit changes with
git commit - Repeat
You’ll occasionally run git status to make sure everything is tracked and staged as you’d expect, but, otherwise, this is the bulk of your Git life as a web developer. You don’t know everything you’ll ever need to know to use Git (You can’t even revert changes which is core to the value of version control.), but you probably won’t need to do anything else for a while. When that time comes, use your search skills to find the commands to accomplish the task in front of you. (It’s one of my core principles of becoming a web developer: learn what you need to know just in time!)
Building a Git Habit
Your challenge for now is to build a habit around using Git… even when you don’t need to. You’ll need to be using Git when you really screw something up, but, once that has happened, it will be too late to start using it.
Make sure each new project starts with a git commit and you’re committing as you go. Get into the habit now so that when the day does come that you need to go back to last week (and it will), you’ll already have your Git safety net in place.
每天推荐一个 GitHub 优质开源项目和一篇精选英文科技或编程文章原文,欢迎关注开源日报。交流QQ群:202790710;微博:https://weibo.com/openingsource;电报群 https://t.me/OpeningSourceOrg

真真是弥补错误修改的福音