開源日報每天推薦一個 GitHub 優質開源項目和一篇精選英文科技或編程文章原文,堅持閱讀《開源日報》,保持每日學習的好習慣。
2024年1月8日,開源日報第1068期:
今日推薦開源項目:《copilot-gpt4-service》
今日推薦英文原文:《Future-proof Your Components With This Game Changing React Pattern》

開源項目
今日推薦開源項目:《copilot-gpt4-service》傳送門:項目鏈接
推薦理由:用 go 將Github Copilot轉變為ChatGPT 4
使用方法:
- 安裝並啟動 copilot-gpt4-service 服務,如本地啟動後,API默認地址為:http://127.0.0.1:8080
- 獲取你的 GitHub 賬號 Github Copilot Plugin Token(詳見下文)
- 安裝第三方客戶端,如:ChatGPT-Next-Web,在設置中填入 copilot-gpt4-service 的 API 地址和 Github Copilot Plugin Token,即可使用 GPT-4 模型進行對話
英文原文
今日推薦英文原文:A Journey into Wasm
推薦理由:作者通過學習Rust和Web Assembly,嘗試在瀏覽器中運行Rust編寫的程序,通過完成Conway's Game of Life教程能初步了解了Rust和Wasm的基本使用
A Journey into Wasm
Overview
I recently had some downtime and decided to spend it looking into Web Assembly or Wasm. It』s something I』ve heard of on and off over the last few years but never really understood very well. Getting started, my understanding initially, was that Wasm was a way to use languages other than JavaScript in the browser. I』d also noted that the Rust programming language seemed to be a popular choice for working with Wasm and that was something else I was keen to have a play with. With this in mind I set about creating an exploration project, the goal of which would be to write a program in Rust and get it to run in the browser.
Take One
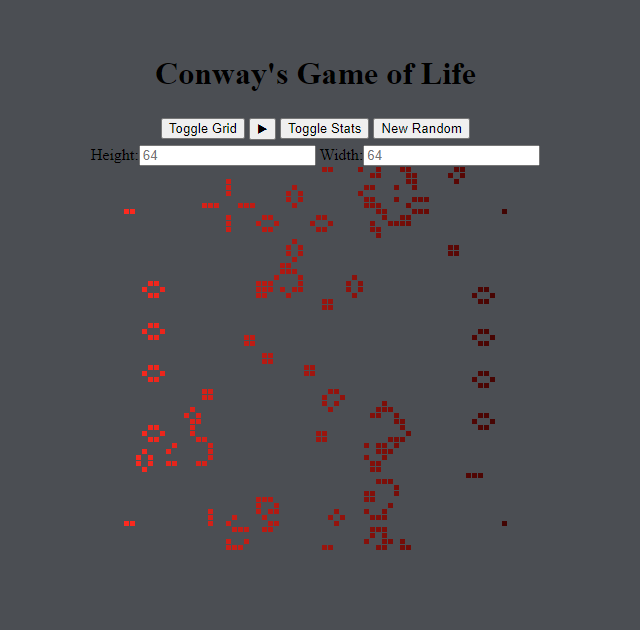
After a quick hunt about on the web I decided to try and follow this tutorial for implementing Conway』s Game of Life in Rust and WebAssembly. I followed the step by step guide and with a bit of tweaking to handle updates in WebPack since the guide was published, I was able to get it working. If you』re interested the results are here.
I was however left feeling a bit dissatisfied with the results of this exercise.
Firstly, I didn』t feel I had learned much about Rust aside from a general overview of it being a low level language, much like C++. As I was following a tutorial, most of the coding was a copy exercise rather than having to solve any problems for myself.
Secondly, the integration with JavaScript didn』t feel very nice. In the tutorial the web part of the code is nested within the overall project and references the Wasm package one level up. This means the Rust and JavaScript code feels quite tightly coupled. The example uses a simple WebPack build using an index.html file which contains the HTML, CSS and link out to the index.js file via a bootstrap.js wrapper file. The index.js file houses all the logic for importing the Wasm file and attaching handlers to buttons etc. The results are effective but doesn』t feel very extensible or easy to maintain. I couldn』t help but feel it would be nicer to swap the UI side of things out to use a framework such as React or Angular. When I tried to integrate my Wasm file with Svelte however I hit a lot of issues and ultimately abandoned that approach.
Lastly, and maybe most importantly, I still wasn』t sure I really understood the value of Wasm in general. Sure, I was able to gain more control over things like memory allocation through the use of Rust, but it felt like a use case I wouldn』t really come across much in day to day work.
Learning
I decided to tackle the last of these things first. Web Assembly still felt a lot like hype to me, rather than something I would get any practical use out of so I had a listen to this great episode of Beyond the Hype to see what the consensus what among those who knew a lot more than me on this topic.
I think the 「ah-ha」 moment for me came when Sean Isom was talking about the potential of moving things like Adobe Photoshop into the browser. That is that WASM could be used to allow, among other things,
- Moving pr-existing codebases into the web without the need to rewrite in JavaScript.
- Move large codebases into the web which wouldn』t be possible to rewrite in JavaScript.
- Allow publishing of library packages that can be written in the most appropriate language and easily consumed by web applications.
Take Two
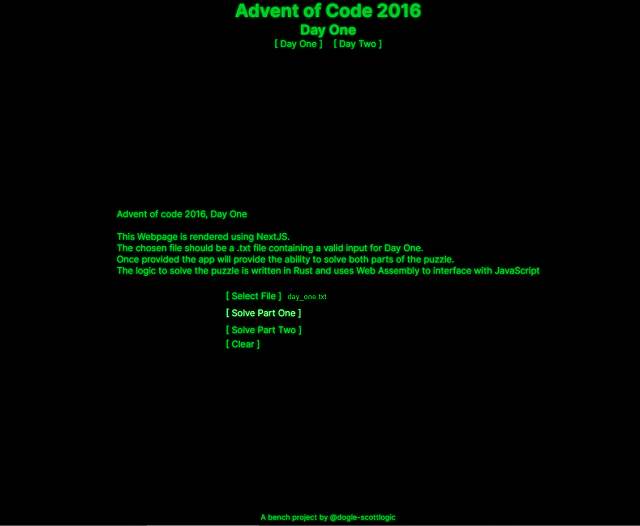
I decided to give this another go, this time stepping away from the tutorial and going it alone. I had recently been working on this years Advent of Code, so I decided to try and solve a few of the challenges in Rust and then integrate it into a Frontend framework like NextJS.
This time things went a little better. Firstly, as I was no longer following a tutorial, I was forced to start learning Rust a little deeper in order to translate what I wanted to do into valid Rust syntax.
Once I was happy I』d got a solution for both parts of Day one I then moved on to compiling the Rust code to Wasm. Leaning on what I』d learnt from the Game of Life tutorial I used wasm_bindgen with my lib.rs file which creates an api exposing two JavaScript functions, one for each of the parts of the puzzle. The functions take a string as an input and return the solution as a number.
mod day_one;

use wasm_bindgen::prelude::*;

#[wasm_bindgen]
pub fn day_one_part_one(input: String) -> i32 {
    return day_one::solve_part_one(input);
}
I then published the Wasm to NPM as a package that I could consume from a JavaScript application.
Next up I needed to build something to consume the package I had created. For this I turned to NextJS. I used the quick start to bootstrap a simple app with TypeScript and ESLint installed. This handled all the setup for me and I immediately had a working web app up and running on port 3000. After stripping out everything I didn』t need I was ready to import my Wasm file.
I added my advent_of_rust package to the dependency to my package.json
"dependencies": {
    "react": "^18",
    "react-dom": "^18",
    "next": "14.0.4",
    "advent_of_rust": "0.2.2"
  },
and then created a useEffect hook that would import the wasm module when the page first loads.
useEffect(() => {
  // Load and instantiate the Wasm module from the CDN
  const wasmModule = import("advent_of_rust");

  wasmModule.then((module) => {
    // Use exported functions from the Wasm module
    setModule(module);
  });
}, []);
The last bit of the puzzle was enabling the experimental feature flag for asyncWebAssembly in WebPack.
module.exports = {
  reactStrictMode: true,
  webpack: function (config, options) {
    config.experiments = { asyncWebAssembly: true, layers: true };
    return config;
  },
};
After this I was able to add an Input element to allow upload of a text file containing the input for a puzzle and then a couple of buttons for solving parts one and two. When pressed the code would pass the input as a string to the exposed function for the relevant part and then display whatever result was returned. A bit of CSS and it was done.
To make sure I was confident in the process I moved on to solving day Two. I then needed to rebuild and publish a new version of the Wasm to expose the two new functions I』d added. Back in NextJS land I then bumped the version in the package.json and updated my code so that a user was able to select which day to solve in the UI.
Conclusion
All told this felt a lot better and I had created something a lot closer to my original goal. The NextJS React App was now responsible only for the UI and allowed me to quickly build out a single page application that could easily be extended and tested with linting, routing and TypeScript built in. All the heavy lifting logic for solving the puzzles was delegated to the Rust code and this code was neatly compiled to a Wasm file and published in NPM, meaning all my React App had to do was add it to the dependency list and pull it in when the page loads. The Rust code can be easily updated and published independently of the UI code and vice versa. I could potentially also build out new applications with other frameworks and consume the same package. There』s some tidy up that would be nice to do of course but in general I feel this has been an interesting and helpful journey into Wasm and I hope it was interesting for you too.
The GitHub code for this project can be found here.
下載開源日報APP:https://openingsource.org/2579/
加入我們:https://openingsource.org/about/join/
關注我們:https://openingsource.org/about/love/
