今日推荐开源项目:《JS爬虫 Jspider》
今日推荐英文原文:《How I Use My Terminal as a Webcam》
今日推荐开源项目:《JS爬虫 Jspider》传送门:项目链接
推荐理由:该项目使用 JavaScript 来发送请求并获取数据,从而快速爬取文件。对于少量的数据来说,右键检查并写几行代码就爬取成功,比开新的 python 脚本要轻松得多。
今日推荐英文原文:《How I Use My Terminal as a Webcam》作者:PRAKHAR KAUSHIK
原文链接:https://medium.com/better-programming/how-i-use-my-terminal-as-a-webcam-b706ccc9d216
推荐理由:作者用 Python 将命令行终端变成了摄像头,不用说肯定很糊,但是这不就是 ASCII 码的艺术所在嘛。
How I Use My Terminal as a Webcam
The TE-WE project
Te-We is a project which focuses on using a webcam just with a terminal. We will be creating a terminal stream powered by Python from a webcam.One day I was going through my system to find a webcam application but was not able to find one because I use Debian Linux, and I had added each and every piece of software manually. I never downloaded anything for the webcam.
So I thought, “why not make something with a terminal for this?” I came across a project which was an image-to-ASCII project, and I thought, “why not combine the video stream with a similar project?” and hence TE-WE was developed.
This whole thing is ASCII art of a video stream from the webcam. If you find it interesting, you can find the whole unscripted programming video of it below.
https://www.youtube.com/watch?v=xvqsFTUsOmc&feature=emb_rel_end
So getting back to the code part — let's start with it.
Step 1
Create an ASCII image using an actual image.Step 2
Replace the ASCII image with a video stream frame and print them one over the other to get the effect of a continuous frame.Done!
Let's discuss everything in detail. Our first aim will be to convert the following image:

(Deadpool (Image source: walpaperlist))to an ASCII image like the one below.
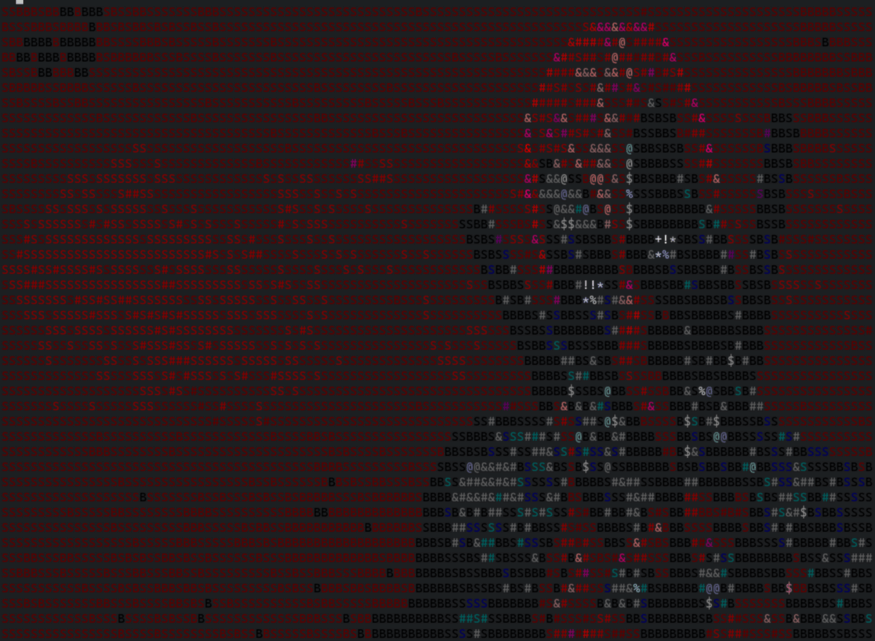
(Deadpool (Image source: Author’s terminal))Once that's done, all that's left is to create a video stream as a source for frames to the program.
Let's see the code first.
def renderImg(img):
    # img = cv2.imread("deadpool.jpg")
    width, height, _ = img.shape
    aspectRatio = height / width
    newWidth = 120
    newHeight = int(newWidth * aspectRatio * 0.25)
    img = cv2.resize(img, (newWidth, newHeight))

    colorCodes = []
    for row in img:
        colorCodes.append([rgb2short_fast(pixel) for pixel in row])
    img = cv2.cvtColor(img, cv2.COLOR_BGR2GRAY)

    chars = ["B", "S", "#", "&", "@", "$", "%", "*", "+", "!", ":", "."]
    newImg = []
    for rowIndex in range(len(img)):
        temp = []
        for cellIndex in range(len(img[rowIndex])):
            print(
                fg(colorCodes[rowIndex][cellIndex])
                + chars[img[rowIndex][cellIndex] // 25],
                end="",
            )
            temp.append(
                fg(colorCodes[rowIndex][cellIndex])
                + chars[img[rowIndex][cellIndex] // 25]
            )
        newImg.append("".join(temp))
        print()
    import sys

    with open("test.txt", "w") as fl:
        fl.writelines(newImg)

    CURSOR_ONE_UP = "\033[A"
    for i in range(len(img)):
        sys.stdout.write(CURSOR_ONE_UP)
Then, based on the intensity of each pixel, we will find a suitable character for each pixel and create an image out of it.
But the problem is that it's still black and white, so the next part will be to get the approximate ANSI color for each pixel, and hence we will find the colored image printed.
Let's see the code to get RGB to ANSI. It was taken from the library torrycrass/image-to-ansi.
So with this, we will get the ANSI color code from RGB, and then we just need to get the ANSI color for each pixel.
And here’s where lines 10–12 will come into action. We are using their RGB value for each pixel and saving the ANSI color code separately before converting the image to black and white.
And done — our first part is done.
Step 2
Adding a video stream is simple and can be found anywhere, as it’s just usingopencv to get the frames from video and print them on the screen.
So here we are, done.
Feedback
Do leave feedback on the project. If you want to check out the source code, it’s on GitHub at pr4k/Te-We.下载开源日报APP:https://openingsource.org/2579/
加入我们:https://openingsource.org/about/join/
关注我们:https://openingsource.org/about/love/
